

February 16, 2020 | Lighting the Car in the Tunnel
- Elizabeth Delos Reyes

- Feb 16, 2020
- 3 min read
Over the weekend, I worked on defining the headlights and general lighting of our Ferrari even further. I took each shot as it's own challenge and adjusted the lights accordingly to ensure maintain the same aesthetic throughout our whole project.
Shot 0
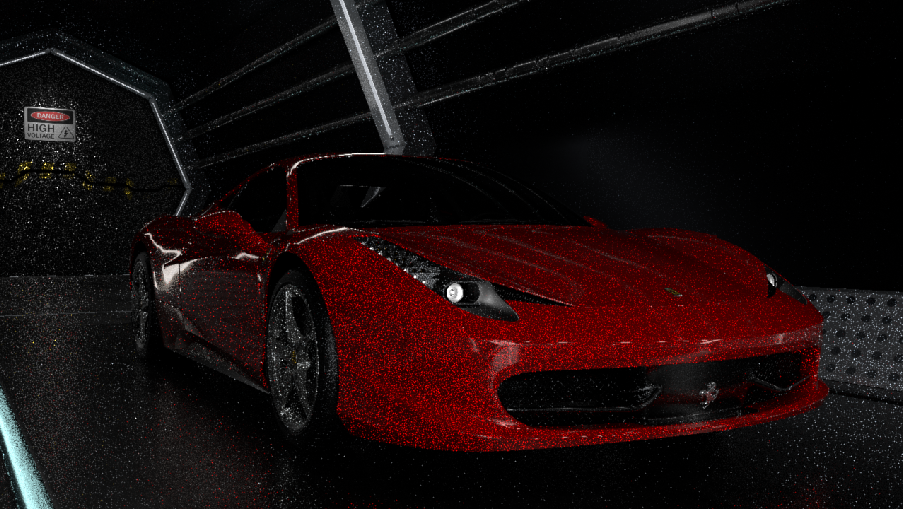
From last week's critique, we were told not to fake the lighting because Arnold does a very good job in mimicking reality due to Physically Based Rendering. Therefore, I made various changed to how shot 0 was lit. I decided to rely solely on the tunnel's lights to light up the car and make it look "sexy". One of the critiques we got was that this has the potential to be a very sexy shot and our car should portray that. Lorena is still making changes to the tunnel and it's over all lighting and her progress can be seen in her blog post here... https://www.artstation.com/lorelai/blog/7ybE/week-6-fixing-tunnel-lights
Below are my test renders with the older version of the tunnel. Here you can see the new headlights and how the tunnel's lights will hit the car's materials.


Furthermore, I made the decision to change the angle of the camera in shot 0 slightly in order to push the narrative of the project. We had Lorena add a "garage door" and a sign that says "Danger High Voltage" to lead into the fact that lightning could strike anytime. This give Yanni's lightning a purpose and it also solves the problem of "where our tunnel is located" or rather it being an "infinite tunnel". This helped solve our stress issue about having too many lights, geo, and render time as well. Here is a screenshot of what the new Shot 0 camera looks like and the addition of the new garage door that Lorena added.


Shot 1
Shot 0 leads into the Shot 1, therefore we kept them in the same environment for rendering. I fixed the headlights in this shot so that it doesn't get blown out on the ground, but still looks like it's lighting up. I made sure that the meshlights inside the headlights were clearly visible and able to be rendered out as a separate pass to comp lens flares/"blow them out". I removed all the "hero lighting" from the car so that we would only rely on the tunnel's lighting to keep it accurate.


Additionally, one of the biggest things missing from this shot is the incorporation of the portal. Although we didn't have a portal rendered for this shot specifically, I wanted to at least fake it. Therefore, at the end of this shot I placed a bright blue light (the same hue as the portal) at the end of the tunnel. I put it in a separate layer so that it could be animated in comp to manifest and affect the car only as the car "leaves the tunnel." In this layer, I assigned the car and the tunnel to have chrome shaders. From here we will use the Specular Indirect AOV to mimick the reflections of the portal's light on the tunnel and the car, much like how we did the reflections on the theater's windows in shots 2 and 3. Here is a test render of that portal light pass from Maya...

Final Thoughts
I think that these two shots are coming together and starting to have more purpose in our narrative. I really aim to bring in the transitions of our project from shot to shot in order to achieve the flow of the narrative.


Comments